Building a Custom Source Connector in Airbyte
A Step-by-Step Guide to Creating Your Own Source Connector Without Coding


Table of contents
- Setting Up Airbyte
- Getting Started
- Generating Source Template
- Install Dependencies
- Understanding Files
- Configure Source
- Adding your First Stream
- Check Connection
- Read Data
- Record Selector
- Adding new Stream
- Paginator
- Parameters
- Airbyte UI/ Sync with Destination
- Incremental Syncs
- Testing
- Add Docs
- What Else
- Conclusion
- More References
Data integration plays a crucial role in consolidating and analyzing data from multiple sources. Airbyte, an open-source data integration platform, simplifies this process by allowing users to create custom connectors for seamless data synchronization between sources and destinations. In this blog post, we will guide you through the process of building a custom source connector in Airbyte without requiring any coding experience. By the end of this tutorial, you will be able to effortlessly extract data from your Http API source and synchronize it with your preferred destination.
Setting Up Airbyte
Before diving into building the custom source connector, you'll need to set up Airbyte on your local machine. This involves downloading the platform, installing prerequisites, and configuring your environment.
First of all install the docker on your system, here are instructions
Run Following Commands in your terminal
  git clone https://github.com/airbytehq/airbyte.git
  cd airbyte
  ./run-ab-platform.sh
Once you see an Airbyte banner, the UI is ready to go at http://localhost:8000! By default, that's username airbyte and password password. You will be asked for a username and password. Once you deploy airbyte to your servers, be sure to change these in your .env file.
Getting Started
Before you start building a source connector in Airbyte, it's essential to thoroughly review the API documentation of the data source you want to integrate. Understanding the available endpoints, data retrieval methods, and required authorization will significantly streamline the connector development process.
In this tutorial, we will build a source connector for Retently using its API documentation. We aim to fetch customer details, campaigns, outbox, and more from Retently. In Airbyte, each endpoint is referred to as a "stream." For example, to access customer data, we'll use the nps/customers endpoint, which will become one stream in our connector. Similarly, we'll create different streams for campaigns, outbox, and other endpoints we need to access. Every stream has one thing in common which is base_url https://app.retently.com/api/v2/
Retently supports two types of authentication: by API Token or using Retently oAuth application.
Generating Source Template
Launch your terminal or command prompt and navigate to the root directory of the Airbyte project. This is typically where you cloned the Airbyte repository from GitHub.
And run this commands
cd airbyte-integrations/connector-templates/generator
./generate.sh
After successfully executing the command to generate the template for your source connector, you will see a list of options that you can navigate using the up and down arrow keys. In our case select Configuration Based Source

Now, enter whatever source name you want, in my case I am using retently

Your template is ready, use this command to navigate to the template cd airbyte-integrations/connectors/source-retently . Open source in your code editor and you will see bunch of files.
Install Dependencies
Create a python virtual enviroment, In order to have seamless exprience use python version>= 3.9. The command below assume that python points to a version of python >=3.9.0. You can also use python3 or python3.9 for specific version.
python -m venv .venv
source .venv/bin/activate
pip install -r requirements.txt
Let's verify everything works as expected by running the Airbyte spec operation:
python main.py spec
If the output is like this we are good to go
{"type": "SPEC", "spec": {"documentationUrl": "https://docs.airbyte.com/integrations/sources/retently", "connectionSpecification": {"title": "Retently Spec", "type": "object", "required": ["api_key"], "additionalProperties": true, "properties": {"api_key": {"type": "string", "description": "API Key"}}}}}
Understanding Files
Let's now understand some files and thier uses.
source-retently/source_retently/manifest.yaml : This file contains how we will retrieve data and read data from API source. In this file, we define the authentication process, request parameters, headers, all streams, check function and etc.
source-retently/integration_tests/configured_catalog.json: This file shows what data is available, here we define all streams and sync_modes.
source-retently/schemas: in the context of a source connector in Airbyte, the "schemas" folder typically contains JSON schema files for each stream defined in the connector. These schemas define the structure of the data that will be fetched and streamed by the connector for each specific stream (endpoint) from the source API.
Now we will start building connector and start understanding manifest.yaml and as we go I will walk you other file.
Configure Source
So open your mainfest.yaml file, go to spec object
type: Spec: Indicates that this YAML block represents a specification.
connection_specification: This section defines the configuration required for the integration. It specifies the properties and parameters that need to be provided to establish a connection and access data from the Retently source.
required: Lists the required properties that must be provided for successful integration.
properties: This section defines the individual properties that make up the configuration.
In the Retently API, authentication can be done using an API key. To set up the Retently source connector in Airbyte, we will take the API key as input from the user. Additionally, if you need to include optional fields, you can add them to the properties without making them required. If a username and password are required for authentication, you can specify them as required fields in the configuration schema.
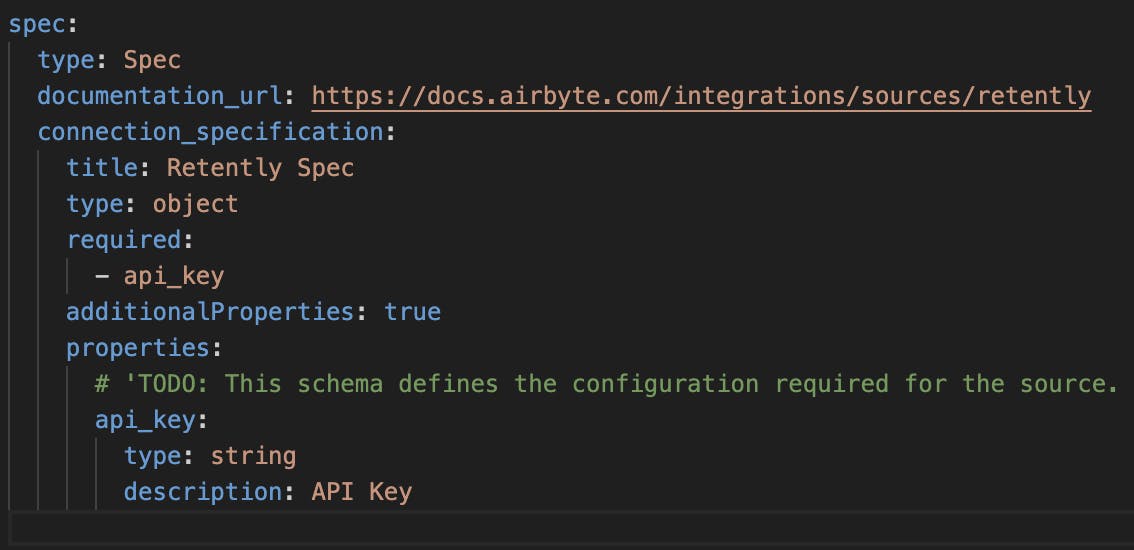
Another Example is here, And below is my type spec object in the manifest.yaml
spec:
  type: Spec
  documentation_url: https://docs.airbyte.com/integrations/sources/retently
  connection_specification:
    title: Retently Spec
    type: object
    required:
      - api_key
    additionalProperties: true
    properties:
      api_key:
        type: string
        description: Retently API Token. See the <a href=\"https://app.retently.com/settings/api/tokens\">docs</a> for more information on how to obtain this key
        airbyte_secret: true
Now add a config file at source-retenlty/secrets/config.json, Add your configuration here and this file is in git ignore so don't worry about pushing it to GitHub.
Adding your First Stream
Airbyte template already added one stream now your mainfest.yaml looks like this
version: "0.29.0"

definitions:
  # Definitions for different components like selectors, extractors, and requesters.

streams:
  # Streams represent the data endpoints (streams) from the source API that will be fetched.

check:
  # Check configuration for the source connector, ensuring its successful operation.

spec:
  # Configuration required for the integration
base_stream: This section defines a base stream configuration using the DeclarativeStream. This can be common to different streams and streams can have this as a base and if you want something different in a particular stream you can define that in that stream.
  base_stream:
    type: DeclarativeStream
    retriever:
      $ref: "#/definitions/retriever"
  customers_stream:
    $ref: "#/definitions/base_stream"
    name: "customers"
    primary_key: "id"
    $parameters:
      path: "/example"
customers_stream: This section defines a specific stream configuration named "customers" that extends the base_stream. We will be adding our own stream here.
requester: Uses the HttpRequester to make HTTP GET requests to the source API with a base URL. Here we define whatever is needed to make a request to API such as the authentication method, request parameter, http_method, and base_url, for more details reference_here.
Now Let's edit the manifest file for our source: Retently API Documentation
First of all, adding base_url in a requester
url_base: "https://app.retently.com/api/v2/"
I will be using ApiKeyAuthenticator for retently, you can reference here
  requester:
    type: HttpRequester
    url_base: "https://app.retently.com/api/v2/"
    http_method: "GET"
    authenticator:
      type: ApiKeyAuthenticator
      header: "Authorization"
      api_token: "api_key={{config['api_key'] }}"
requester with OAuth authentication, header, and parameter is here(for reference)
Adding campaigns_stream now, path is API endpoint to fetch campaigns
  campaigns_stream:
    $ref: "#/definitions/base_stream"
    name: "campaigns"
    primary_key: "id"
    $parameters:
      path: "campaigns"
Modify check
check:
  type: CheckStream
  stream_names:
    - "campaigns"
And Congratulation You have successfully added your first stream.
Check Connection
Lets check now if everything is working fine or not, In order to do that first, we have to modify source-retently/integration_tests/configured_catalog.json: Let airbyte know there is stream name campaigns, so add campaign stream there.
{
  "streams": [
    {
      "stream": {
        "name": "campaigns",
        "json_schema": {},
        "supported_sync_modes": ["full_refresh"]
      },
      "sync_mode": "full_refresh",
      "destination_sync_mode": "overwrite"
    }
  ]
}
python main.py check --config secrets/config.json
Use this command to check your configuration if airbyte is getting connected to stream it will show
{"type": "LOG", "log": {"level": "INFO", "message": "Check succeeded"}}
{"type": "CONNECTION_STATUS", "connectionStatus": {"status": "SUCCEEDED"}}
Read Data
Let's Read data from the campaign stream
Add schema for the campaign stream in the schema folder, Remember the name of the schema name should be the same as the stream name.
Your schema should be in this format, You can use easily use a chatbot to convert your schema like the given schema, always keep "additionalProperties": true.
source-retently/source_retently/schema/campaigns.json :
{
  "$schema": "http://json-schema.org/draft-07/schema#",
  "type": "object",
  "additionalProperties": true,
  "properties": {
    "id": {
      "type": ["null", "string"]
    },
    "name": {
      "type": ["null", "string"]
    },
    "isActive": {
      "type": ["null", "boolean"]
    },
    "templateId": {
      "type": ["null", "string"]
    },
    "metric": {
      "type": ["null", "string"]
    },
    "type": {
      "type": ["null", "string"]
    },
    "channel": {
      "type": ["null", "string"]
    }
  }
}
Let's Read Data now from the campaigns stream:
python main.py read --config secrets/config.json --catalog integration_tests/configured_catalog.json
If everything is fine stream should start and stopped properly

Record Selector
Notice in the record it is also reading code, messages, then campaigns because retently API is sending responses that way I do not want that, I want only things inside campaigns should be read. For that, we will modify the selector
: Represents a record selector, which defines how records will be selected from the data source (used for filtering).
More about them here
  selector_campaigns:
    type: RecordSelector
    extractor:
      type: DpathExtractor
      field_path: ["campaigns"]

  campaigns_stream:
    $ref: "#/definitions/base_stream"
    retriever:
      $ref: "#/definitions/retriever"
      record_selector:
        $ref: "#/definitions/selector_campaigns"
    name: "campaigns"
    primary_key: "id"
    $parameters:
      path: "campaigns"
Adding new Stream
Now I will be adding another stream named companies with path: "companies"
  companies_stream:
    $ref: "#/definitions/base_stream"
    retriever:
      $ref: "#/definitions/retriever"
      record_selector:
        $ref: "#/definitions/selector_companies"
    name: "companies"
    primary_key: "id"
    $parameters:
      path: "companies"

streams:
  - "#/definitions/campaigns_stream"
  - "#/definitions/companies_stream
Adding selector for companies stream, here response is like this
{
  "data": {
    "companies": [
      {
        "id": 1
      },
      {
        "id": 2
      }
    ]
  }
}
So to extract a response from this, we can use selector like this
  selector_companies:
    type: RecordSelector
    extractor:
      type: DpathExtractor
      field_path: ["data","companies"]
Now modify configured_catalog and add schema of companies stream in schemas
Paginator
The paginator section defines the pagination settings for the source connector. Given a page size and a pagination strategy, the DefaultPaginator will point to pages of results for as long as its strategy returns a next_page_token.
paginator:
  type: "DefaultPaginator"
  pagination_strategy:
    type: "PageIncrement"
    page_size: 20
    start_from_page: 1
  page_token_option:
    type: "RequestOption"
    inject_into: "request_parameter"
    field_name: "page"
The following paginator example will fetch 20 records per page, and specify the page number as a request_parameter.
If the page contains less than 20 records, then the paginator knows there are no more pages to fetch. If the API returns more records than requested, all records will be processed.
There are more pagination techniques here
You can add as many streams you want to, customize as you want, in retently I am adding more stream customers, feedback, outbox, reports, NPS, templates.
Here is how retently manifest.yaml looks like now :
version: "0.29.0"

definitions:
  selector:
    type: RecordSelector
    extractor:
      type: DpathExtractor
      field_path: ["data"]
  selector_campaigns:
    type: RecordSelector
    extractor:
      type: DpathExtractor
      field_path: ["campaigns"]
  selector_customers:
    type: RecordSelector
    extractor:
      type: DpathExtractor
      field_path: ["data","subscribers"]
  selector_companies:
    type: RecordSelector
    extractor:
      type: DpathExtractor
      field_path: ["data","companies"]
  selector_feedback:
    type: RecordSelector
    extractor:
      type: DpathExtractor
      field_path: ["data","responses"]
  selector_outbox:
    type: RecordSelector
    extractor:
      type: DpathExtractor
      field_path: ["data","surveys"]

  requester:
    type: HttpRequester
    url_base: "https://app.retently.com/api/v2/"
    http_method: "GET"
    authenticator:
      type: ApiKeyAuthenticator
      header: "Authorization"
      api_token: "api_key={{config['ApiKey'] }}"

  retriever:
    type: SimpleRetriever
    record_selector:
      $ref: "#/definitions/selector"
    paginator:
      type: "DefaultPaginator"
      pagination_strategy:
        type: "PageIncrement"
        page_size: 20
        start_from_page: 1
      page_token_option:
        type: "RequestOption"
        inject_into: "request_parameter"
        field_name: "page"
    requester:
      $ref: "#/definitions/requester"

  base_stream:
    type: DeclarativeStream
    retriever:
      $ref: "#/definitions/retriever"

  campaigns_stream:
    $ref: "#/definitions/base_stream"
    retriever:
      $ref: "#/definitions/retriever"
      record_selector:
        $ref: "#/definitions/selector_campaigns"
      paginator:
        type: NoPagination
    name: "campaigns"
    primary_key: "id"
    $parameters:
      path: "campaigns"

  companies_stream:
    $ref: "#/definitions/base_stream"
    retriever:
      $ref: "#/definitions/retriever"
      record_selector:
        $ref: "#/definitions/selector_companies"
    name: "companies"
    primary_key: "id"
    $parameters:
      path: "companies"

  customers_stream:
    $ref: "#/definitions/base_stream"
    retriever:
      $ref: "#/definitions/retriever"
      record_selector:
        $ref: "#/definitions/selector_customers"
    name: "customers"
    primary_key: "id"
    $parameters:
      path: "nps/customers"


  feedback_stream:
    $ref: "#/definitions/base_stream"
    retriever:
      $ref: "#/definitions/retriever"
      record_selector:
        $ref: "#/definitions/selector_feedback"
      paginator:
        type: "DefaultPaginator"
        pagination_strategy:
          type: "PageIncrement"
          page_size: 10
          start_from_page: 1
        page_token_option:
          type: "RequestOption"
          inject_into: "request_parameter"
          field_name: "page"
    name: "feedback"
    primary_key: "id"
    $parameters:
      path: "feedback"

  outbox_stream:
    $ref: "#/definitions/base_stream"
    retriever:
      $ref: "#/definitions/retriever"
      record_selector:
        $ref: "#/definitions/selector_outbox"
    name: "outbox"
    $parameters:
      path: "nps/outbox"

  reports_stream:
    $ref: "#/definitions/base_stream"
    retriever:
      $ref: "#/definitions/retriever"
      record_selector:
        $ref: "#/definitions/selector"
      paginator:
        type: NoPagination
    name: "reports"
    $parameters:
      path: "reports"

  nps_stream:
    $ref: "#/definitions/base_stream"
    retriever:
      $ref: "#/definitions/retriever"
      record_selector:
        $ref: "#/definitions/selector"
      paginator:
        type: NoPagination
    name: "nps"
    $parameters:
      path: "nps/score"

  templates_stream:
    $ref: "#/definitions/base_stream"
    retriever:
      $ref: "#/definitions/retriever"
      record_selector:
        $ref: "#/definitions/selector"
    name: "templates"
    primary_key: "id"
    $parameters:
      path: "templates"

streams:
  - "#/definitions/campaigns_stream"
  - "#/definitions/companies_stream"
  - "#/definitions/customers_stream"
  - "#/definitions/feedback_stream"
  - "#/definitions/outbox_stream"
  - "#/definitions/reports_stream"
  - "#/definitions/nps_stream"
  - "#/definitions/templates_stream"

check:
  type: CheckStream
  stream_names:
    - "customers"

spec:
  type: Spec
  documentation_url: https://docs.airbyte.com/integrations/sources/retently
  connection_specification:
    title: Retently Spec
    type: object
    required:
      - ApiKey
    additionalProperties: true
    properties:
      ApiKey:
        type: string
        description: Retently API Token. See the <a href=\"https://app.retently.com/settings/api/tokens\">docs</a> for more information on how to obtain this key
        airbyte_secret: true
Parameters
Parameters can be passed down from a parent component to its subcomponents using the $parameters key. This can be used to avoid repetitions.
So currently I am creating a different selector for each stream like for campaigns selector_campaigns because we need to extract field_path: ["campaigns"] and likewise for all other streams, which kind of repetition we don't want that that is why now we will use parameter.
So will define a path_extractor in each stream which will have information on what to extract from that stream and then will call that parameter in a selector.
  //Example
  selector:
    type: RecordSelector
    extractor:
      type: DpathExtractor
      field_path: ["{{ parameters.path_extractor }}"]

  retriever:
    type: SimpleRetriever
    record_selector:
      $ref: "#/definitions/selector"

  companies_stream:
    $ref: "#/definitions/base_stream"
    name: "companies"
    primary_key: "id"
    $parameters:
      path_extractor: "companies"
      path: "companies"
More about parameters here
Now manifest.yaml looks like :
definitions:
  selector:
    type: RecordSelector
    extractor:
      type: DpathExtractor
      field_path: ["data", "{{ parameters.path_extractor }}"]
  selector_data:
    type: RecordSelector
    extractor:
      type: DpathExtractor
      field_path: ["{{ parameters.path_extractor }}"]

  requester:
    type: HttpRequester
    url_base: "https://app.retently.com/api/v2/"
    http_method: "GET"
    authenticator:
      type: ApiKeyAuthenticator
      header: "Authorization"
      api_token: "api_key={{config['ApiKey'] }}"

  retriever:
    type: SimpleRetriever
    record_selector:
      $ref: "#/definitions/selector"
    paginator:
      type: "DefaultPaginator"
      pagination_strategy:
        type: "PageIncrement"
        page_size: 20
        start_from_page: 1
      page_token_option:
        type: "RequestOption"
        inject_into: "request_parameter"
        field_name: "page"
    requester:
      $ref: "#/definitions/requester"

  base_stream:
    type: DeclarativeStream
    retriever:
      $ref: "#/definitions/retriever"

  campaigns_stream:
    $ref: "#/definitions/base_stream"
    retriever:
      $ref: "#/definitions/retriever"
      record_selector:
        $ref: "#/definitions/selector_data"
      paginator:
        type: NoPagination
    name: "campaigns"
    primary_key: "id"
    $parameters:
      path_extractor: "campaigns"
      path: "campaigns"

  companies_stream:
    $ref: "#/definitions/base_stream"
    name: "companies"
    primary_key: "id"
    $parameters:
      path_extractor: "companies"
      path: "companies"

  customers_stream:
    $ref: "#/definitions/base_stream"
    name: "customers"
    primary_key: "id"
    $parameters:
      path_extractor: "subscribers"
      path: "nps/customers"


  feedback_stream:
    $ref: "#/definitions/base_stream"
    retriever:
      $ref: "#/definitions/retriever"
      paginator:
        type: "DefaultPaginator"
        pagination_strategy:
          type: "PageIncrement"
          page_size: 10
          start_from_page: 1
        page_token_option:
          type: "RequestOption"
          inject_into: "request_parameter"
          field_name: "page"
    name: "feedback"
    primary_key: "id"
    $parameters:
      path_extractor: "responses"
      path: "feedback"

  outbox_stream:
    $ref: "#/definitions/base_stream"
    name: "outbox"
    $parameters:
      path_extractor: "surveys"
      path: "nps/outbox"

  reports_stream:
    $ref: "#/definitions/base_stream"
    retriever:
      $ref: "#/definitions/retriever"
      record_selector:
        $ref: "#/definitions/selector_data"
      paginator:
        type: NoPagination
    name: "reports"
    $parameters:
      path_extractor: "data"
      path: "reports"

  nps_stream:
    $ref: "#/definitions/base_stream"
    retriever:
      $ref: "#/definitions/retriever"
      record_selector:
        $ref: "#/definitions/selector_data"
      paginator:
        type: NoPagination
    name: "nps"
    $parameters:
      path_extractor: "data"
      path: "nps/score"

  templates_stream:
    $ref: "#/definitions/base_stream"
    name: "templates"
    retriever:
      $ref: "#/definitions/retriever"
      record_selector:
        $ref: "#/definitions/selector_data"
    primary_key: "id"
    $parameters:
      path_extractor: "data"
      path: "templates"
Airbyte UI/ Sync with Destination
To run Airbyte locally use the command in the root folder of airbyte:
./run-ab-platform.sh
Once you see an Airbyte banner, the UI is ready to go at http://localhost:8000! You will be asked for a username and password. By default, that's username airbyte and password password. Once you deploy airbyte to your servers, be sure to change these in your .env file.
Before using source connector on UI build docker image of connector using:
docker build . -t airbyte/source-retently:dev
Now on airbyte ui click on :settings => sources => New Connector => Add New Docker connector
Add Details :

Now to use your source click on :
Sources=>New Source => Enter Source Name =>Add configuration & Setup Source

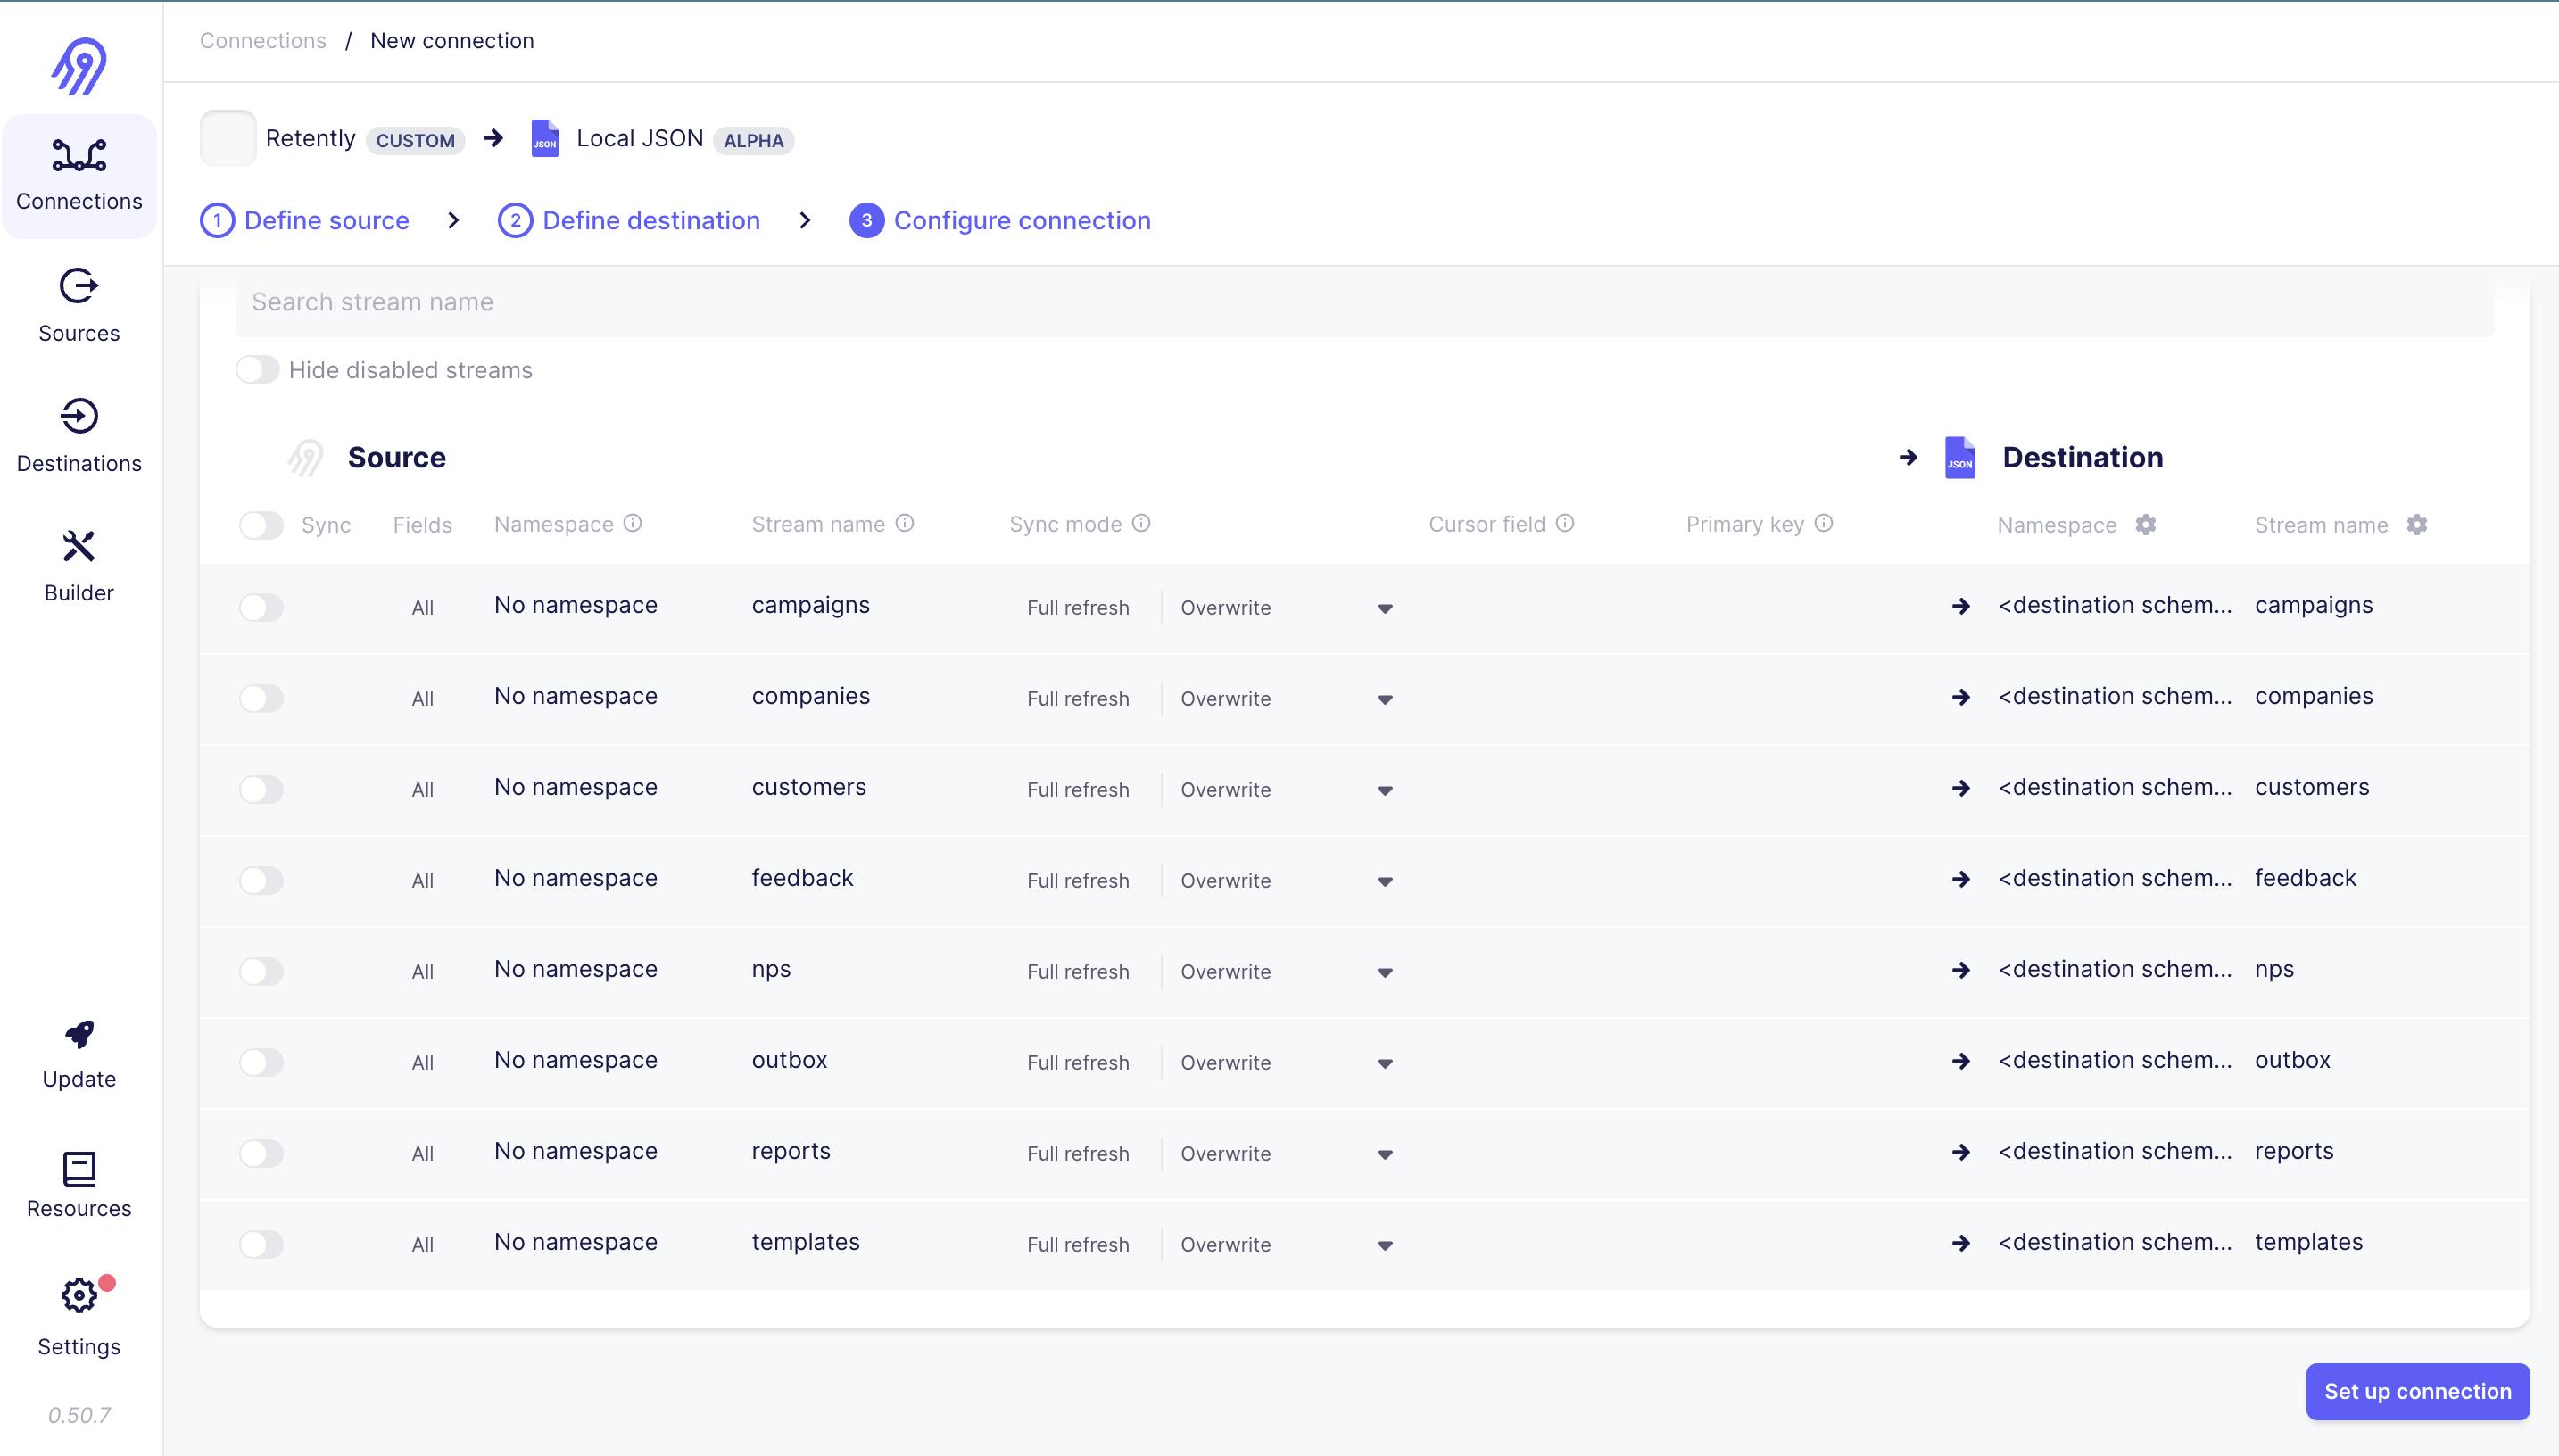
Click on connection add a destination and now you can see all streams and different sync options also, Click Setup Connection and you are ready to sync data
That's how Airbyte makes it incredibly easy to build your custom source connector even if you don't have any coding experience. With Airbyte's Configuration-Based Source feature, you can create a connector to extract data from your desired source without writing a single line of code.
Incremental Syncs
Incremental sync is a technique used in data integration to fetch only the new or updated data from the source since the last sync, rather than retrieving the entire dataset every time. This approach helps reduce the processing load, minimizes data transfer, and improves overall performance for data synchronization.
More about incremental Sync here
Reference for Incremental Sync here
Testing
Testing a source connector is a critical step in ensuring its functionality, reliability, and compatibility with Airbyte.
Build Docker image of Source:
docker build . -t airbyte/source-retently:dev
Run the Acceptance test using:
python -m pytest integration_tests -p integration_tests.acceptance
Make sure to modify acceptance-test-config.yaml according to your source before running acceptance tests.
You can also use docker to run an acceptance test:
./acceptance-test-docker.sh
The result may look like this:
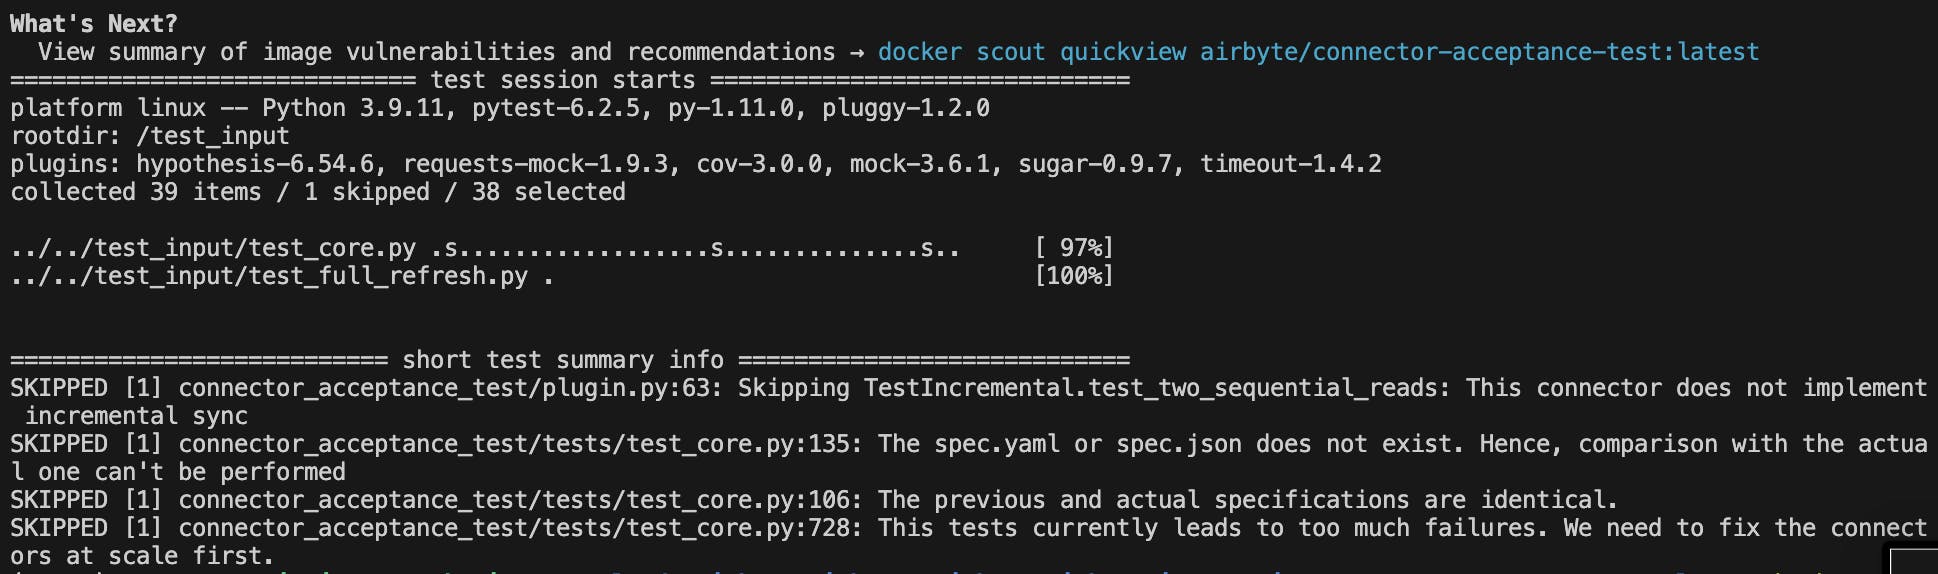
Add Docs
Document the setup and configuration steps for your custom connector. Include troubleshooting guidelines to help users understand and use the connector effectively.
From airbyte root directory open docs/integrations/sources/retently.md
Put yourself in the shoes of your users and think about their journey while using the connector. Begin the documentation with a quick start guide that walks users through the essential steps to get started with the connector. Include clear instructions for authentication and about all streams.
Take reference from here.
In your source doc always add # change log, And edit it whenever you make changes or create a PR. This help in keeping track of Connector.
# Change Log
| Version | Date       | Pull Request                                             | Subject                                                         |
|:--------|:-----------|:---------------------------------------------------------|:----------------------------------------------------------------|
| 0.0.1   | 2023-08-05 | [PR_ID](PULL_REQUEST_LINK) | New Source Retently Adde                                 |
What Else
In certain scenarios, you may need to create custom classes in Python to extend the capabilities of your source connector. One common use case is when authentication involves generating an API key in the program using a username and password. To handle this, you can create a custom authenticator class in Python that implements the necessary logic to generate the API key using the provided credentials. You can then integrate this custom class into your source connector's codebase.
One such example here, See how we use python for authentication.
Conclusion
in Airbyte without coding experience is an accessible and empowering endeavour that enables seamless data integration and synchronization. Through this step-by-step guide, you've learned how to create a custom source connector. So common steps are
Set Up Airbyte
Explore API Documentation
Generate Source Templates
Configure Streams
Implement Requester and Authenticator
Add a first stream and Add that to Checks
Utilize Parameters, Paginator and Extractor
Add Incremental Syncs
Testing and Documentation
Customization
I hope this explanation provides you with a comprehensive understanding of building your own Airbyte source connector.
Thanks for Reading, Sayōnara.
More References
In this section, I will be providing some references that can help you while creating connectors,
Airbyte Docs: First of all Airbyte docs are the best way to understand things.
Souce-retently : source retently complete code
Source-railz: Use this source as a reference while implementing custom classes
Source-square: For OAuth authentication & api_key auth || multiple authentications
Yaml-references: This page lists all components, interpolation variables and interpolation macros that can be used when defining a low-code YAML file.
Airbyte-slack: Ask your doubts here, the community is always there to help you